windows下使用vscode编写运行以及调试C/C++
前面废话
为什么使用vscode?因为免费!因为win10企业版不能安装vs
环境
win10 企业版
vs code 版本: 1.35.1 (user setup)
1.下载安装 VScode
官网下载地址:https://code.visualstudio.com
无脑安装
2.安装 VScode c/c++插件
搜到后点击安装即可,安装完成后需要重启VScode插件才会生效。

3.安装编译器(mingw-w64)
VScode不提供编译器,所以我们必须自己安装编译器,我使用的windows系统下的mingw-w64。
安装方式参考:MinGW-w64安装教程——著名C/C++编译器GCC的Windows版本
4.VScode内配置c/c++运行与调试
1),启动 VScode,打开自己的工作目录(需要事先新建一个文件夹作为我们的工作目录)。
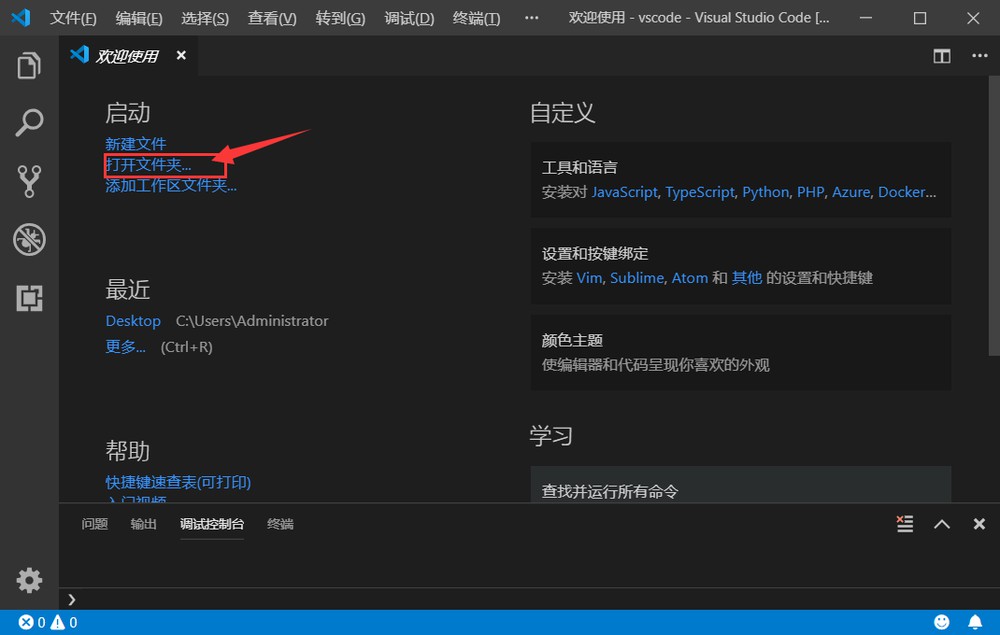
创建配置文件
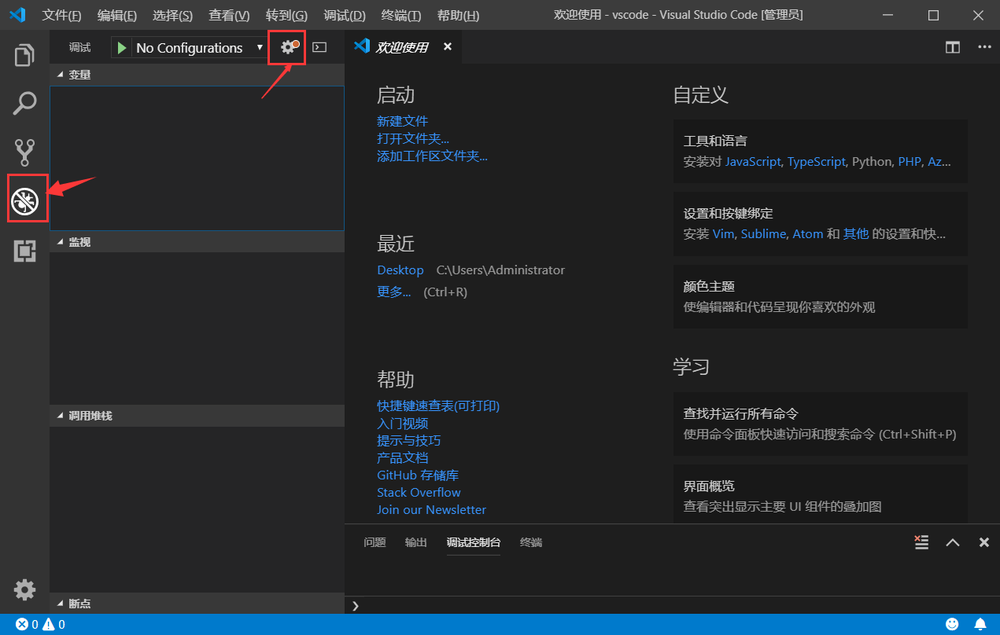
随意选择一个:

回到资源管理器界面,我们可以看到目录下多了一个.vscode的文件夹,里面有一个launch.json文件。
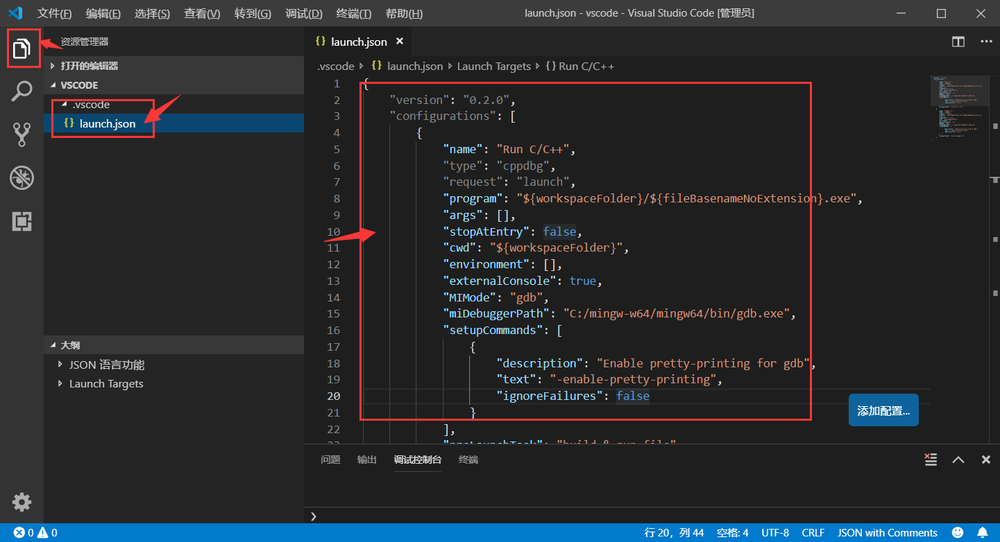
将 launch.json文件的内容替换为下面内容,然后保存。(需要修改两处路径)
{
    "version": "0.2.0",
    "configurations": [
        {
            "name": "Run C/C++",
            "type": "cppdbg",
            "request": "launch",
            "program": "${workspaceFolder}/${fileBasenameNoExtension}.exe",
            "args": [],
            "stopAtEntry": false,
            "cwd": "${workspaceFolder}",
            "environment": [],
            "externalConsole": true,
            "MIMode": "gdb",
            "miDebuggerPath": "C:/mingw-w64/mingw64/bin/gdb.exe",
    "setupCommands": [
                {
                    "description": "Enable pretty-printing for gdb", //这里的路径修改成你自己的
                    "text": "-enable-pretty-printing",
                    "ignoreFailures": false
                }
            ],
            "preLaunchTask": "build & run file"
        },
        {
            "name": "Debug C/C++",
            "type": "cppdbg",
            "request": "launch",
            "program": "${workspaceFolder}/${fileBasenameNoExtension}.exe",
            "args": [],
            "stopAtEntry": false,
            "cwd": "${workspaceFolder}",
            "environment": [],
            "externalConsole": true,
            "MIMode": "gdb",
            "miDebuggerPath": "C:/mingw-w64/mingw64/bin/gdb.exe",  //这里的路径修改成你自己的
    "setupCommands": [
                {
                    "description": "Enable pretty-printing for gdb",
                    "text": "-enable-pretty-printing",
                    "ignoreFailures": false
                }
            ],
            "preLaunchTask": "build & debug file"
        }
    ]
}再在.vscode的文件夹新建一个tasks.json文件,将下面内容复制进去,保存。(直接全部拷贝下面内容,不需要修改)
其中gcc和g++为c和c++编译器:根据自己的代码情况,对下面的 command 进行相应修改。
{
    "version": "2.0.0",
    "tasks": [
        {
            "label": "build & debug file",
            "type": "shell",
            "command": "g++",
            "args": [
                "-g",
                "-o",
                "${fileBasenameNoExtension}",
                "${file}"
            ],
            "group": {
                "kind": "build",
                "isDefault": true
            }
        },
        {
            "label": "build & run file",
            "type": "shell",
            "command": "g++",
            "args": [
                "-o",
                "${fileBasenameNoExtension}",
                "${file}"
            ],
            "group": {
                "kind": "build",
                "isDefault": true
            }
        }
    ]
}保存完再回到调试界面,可以发现出现了两个新的配置,一个是运行程序的Run,一个是用来调试程序的Debug。
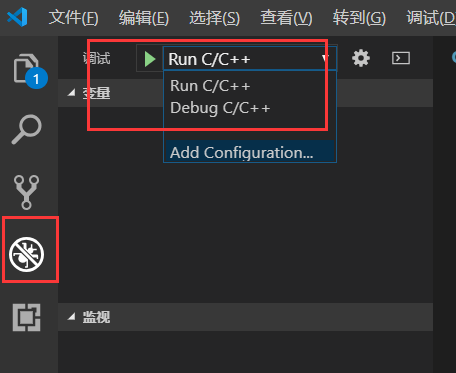
5.测试
创建一个简单的 C 程序,进行测试
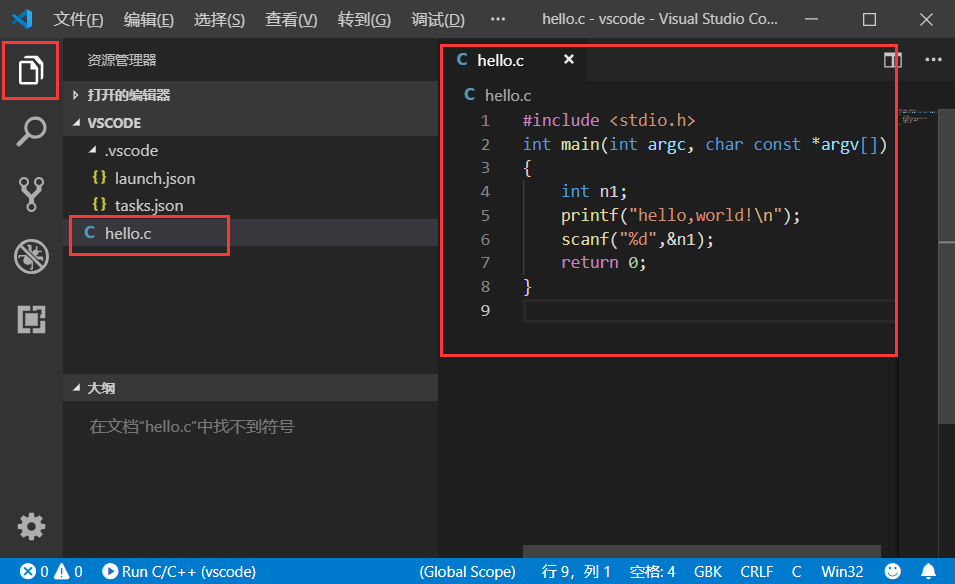
hello.c
#include <stdio.h>
int main(int argc, char const *argv[])
{
    int n1;
    printf("hello,world!\n");
    scanf("%d", &n1);
    return 0;
}
直接 F5 启动调试,或者切换到下面 run 调试
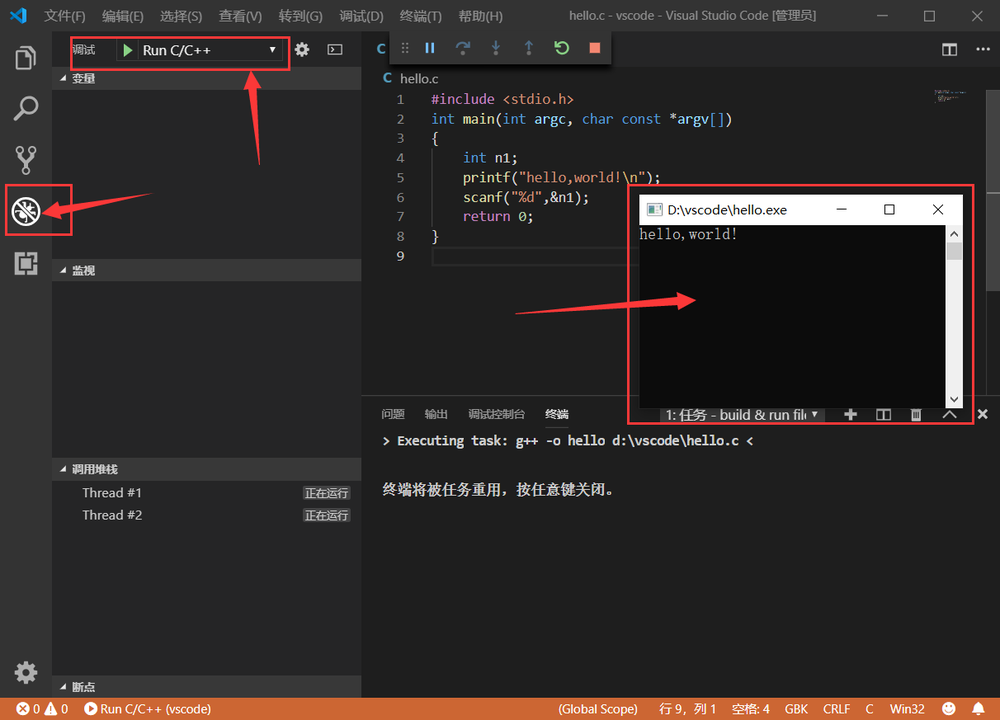
以上就是利用VScode配置c/c++环境的全部内容。以后可以欢快的写bug了。
如果测试中文显示有乱码,请参考文章:解决vscode调试程序后中文出现乱码的问题

共 0 条评论